Configuration in Nitrobox
-
Authentication
Implement ELR authentication via Avalara’s supported methods before invoking ELR APIs
-
Configuration
-
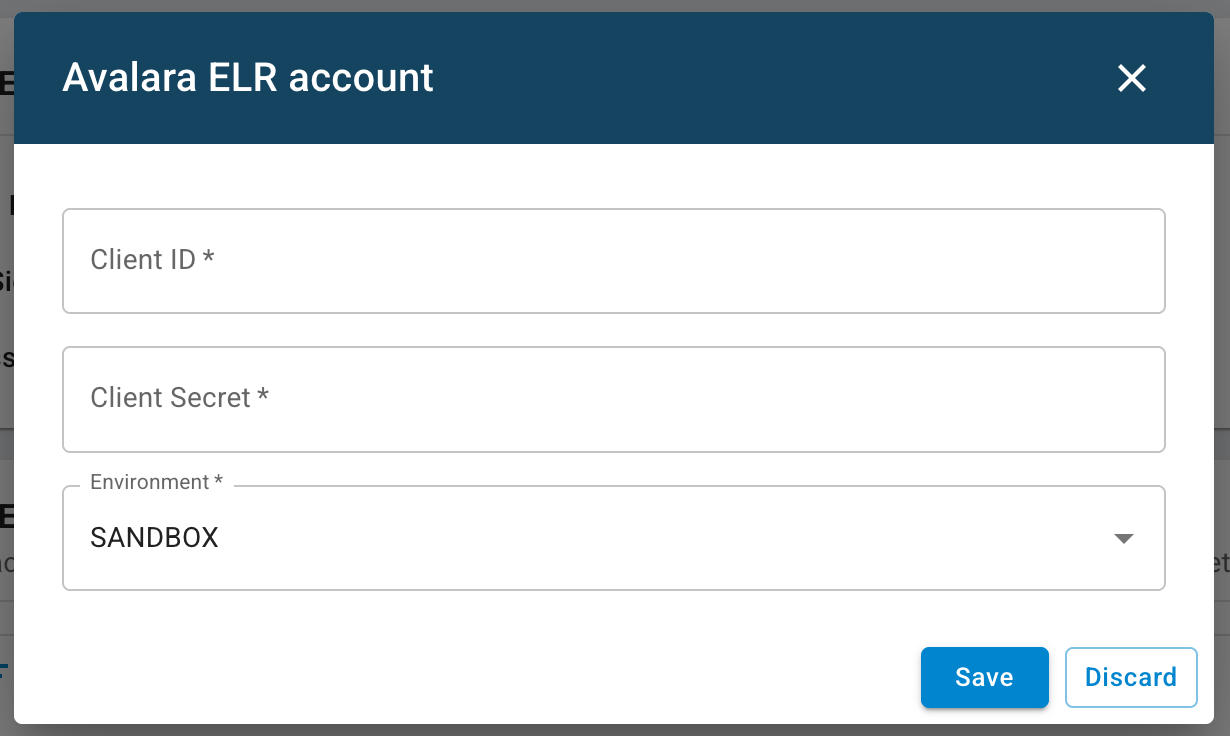
Add Avalara ELR under Integration → E‑Invoicing Provider → Avalara ELR
-
Provide Client ID, Client Secret
-
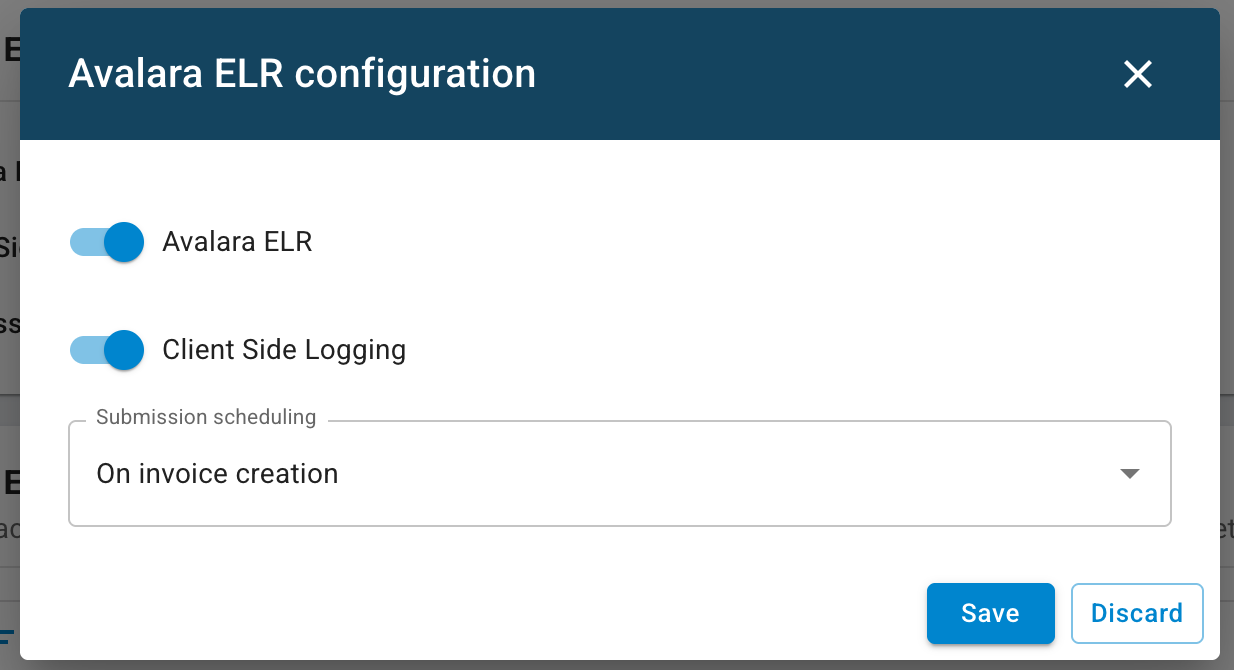
Enable Avalara ELR
-
Enable Client Side Logging for API logs include request/response payloads
-
Before invoice provisioning, you need to create a Mandate Mapping:
-
Navigate to Integration -> E-Invoicing Provider -> Avalara ELR
-
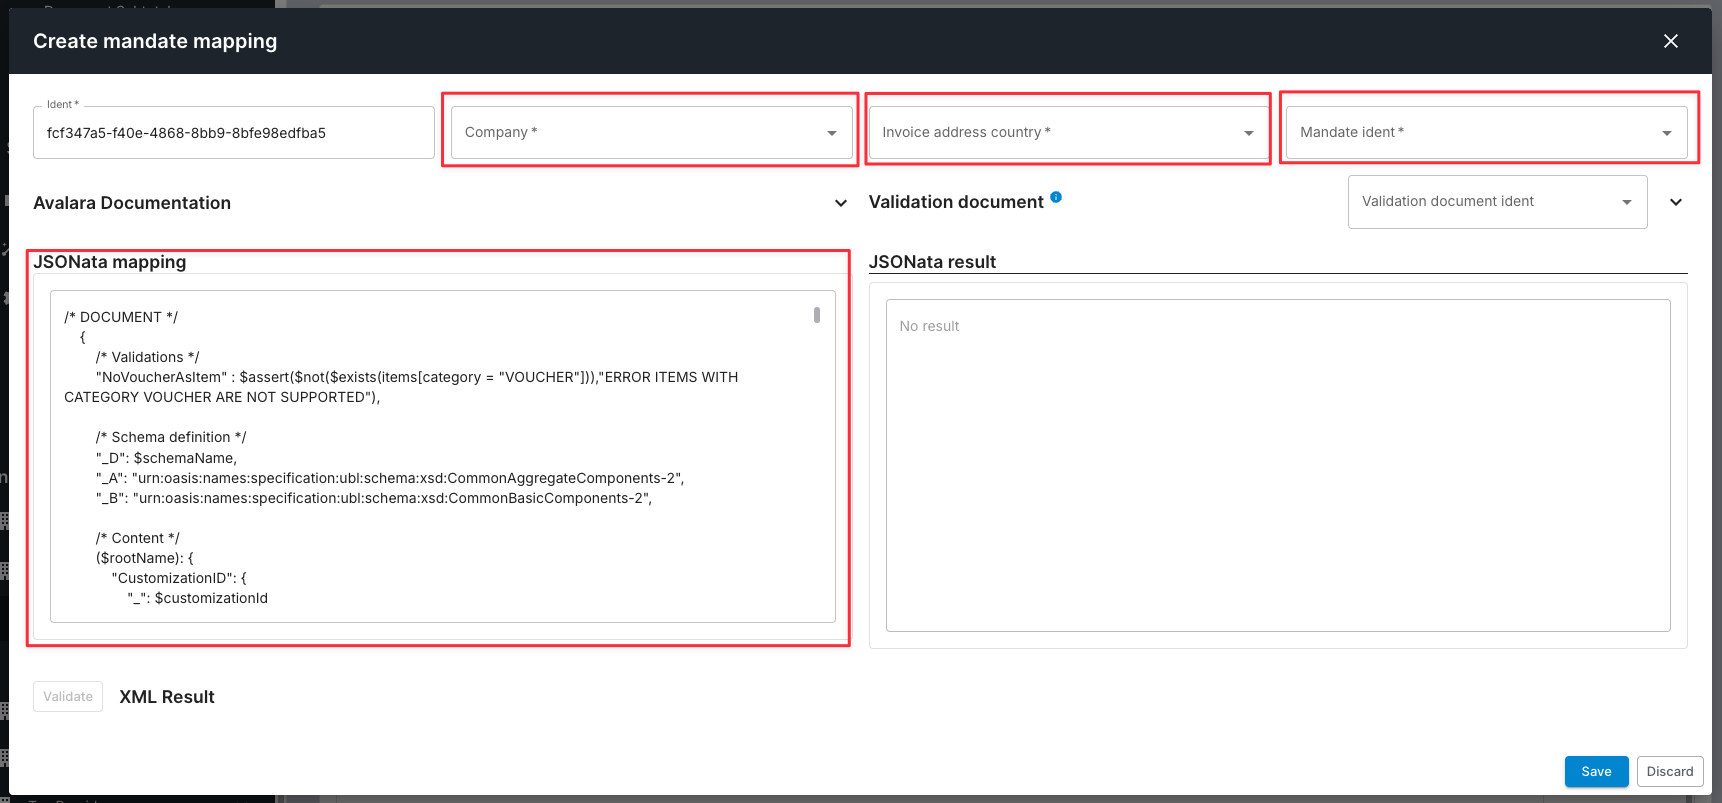
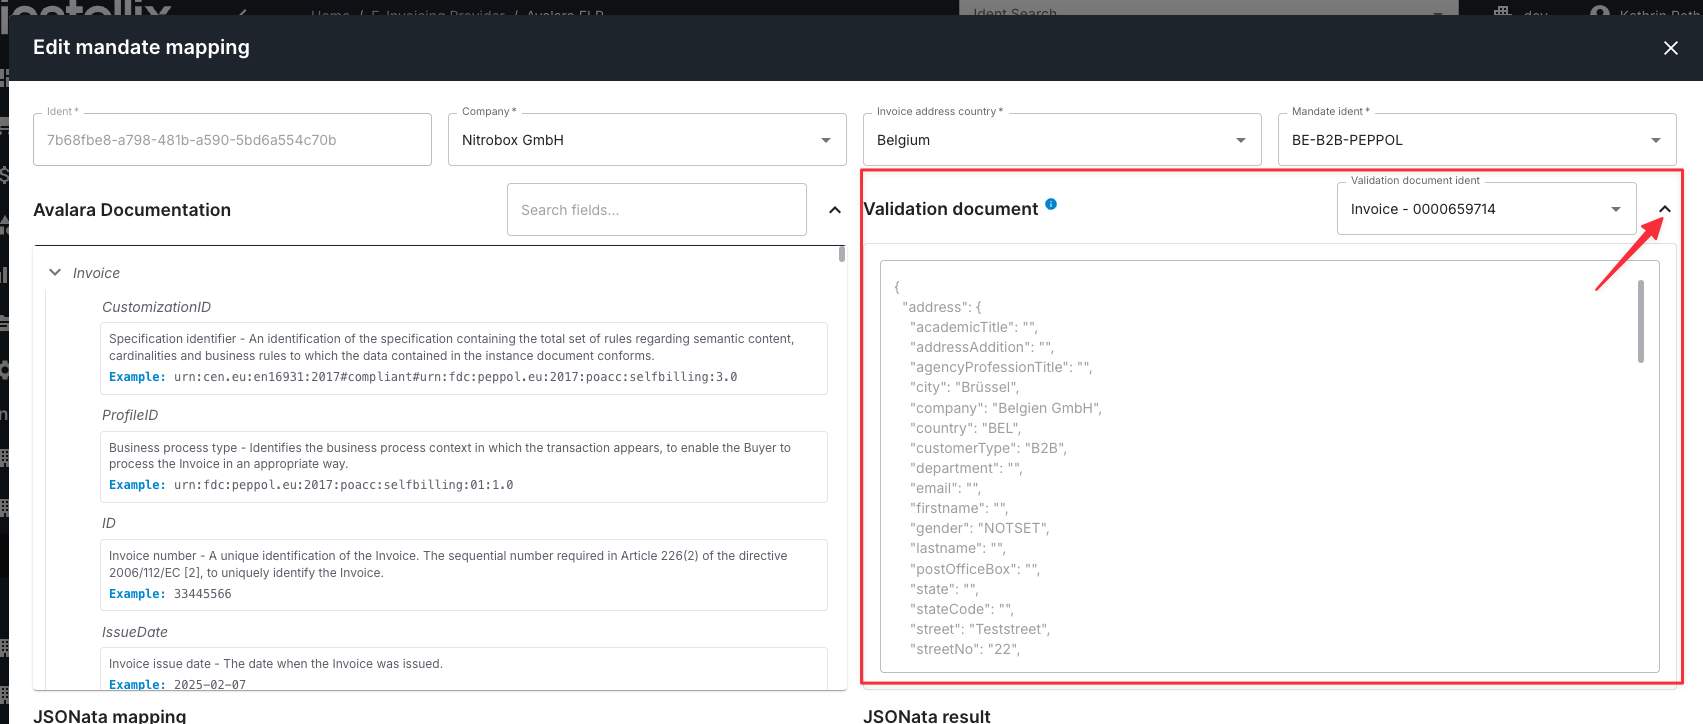
To define a mandate mapping, click the + icon in the “Avalara ELR Company and Mandate Mapping” section and fill in the following fields:
-
Ident: Enter any unique identifier for this mapping. It is used internally only.
-
Company: Select the company that corresponds to your Avalara ELR account. (This must be configured in the Avalara ELR web portal.) Only companies with at least one completed activation in Avalara ELR will appear here.
-
Invoice address country: Select the destination country of the invoice. This is used to determine the applicable mandate.
-
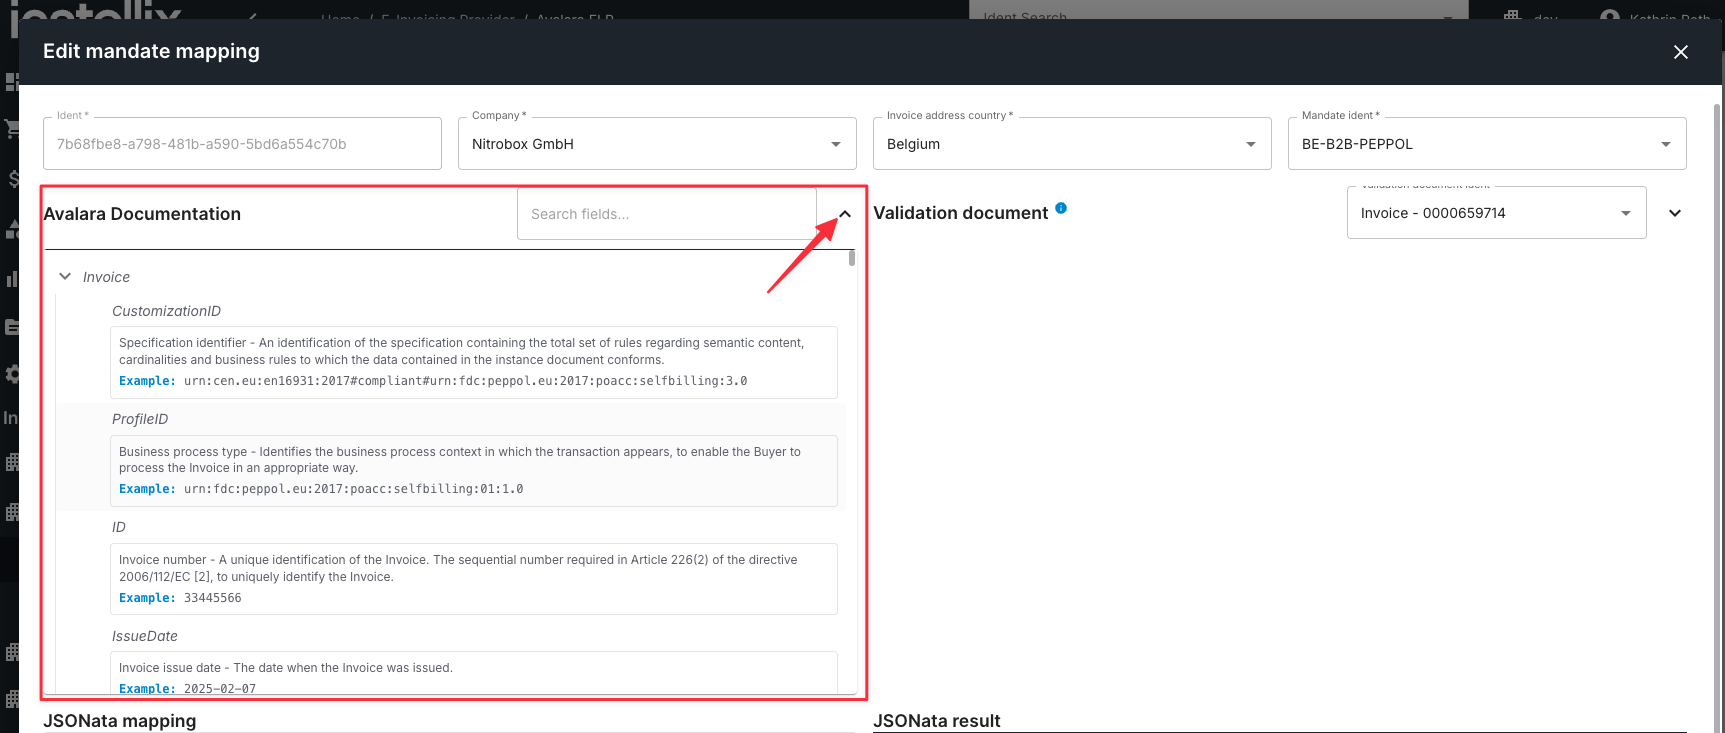
Mandate Ident: Based on the selected country, available mandates (e.g., RO-B2C-PEPPOL, RO-B2B-PEPPOL) will be listed. Choose the one relevant for your use case. By expanding the "Avalara Documentation", you will find the related documentation and descriptions.
-
Validation document Ident: The document number entered here will be used during saving to verify the JSONata mapping. The document number must exist in this environment, and the corresponding document should be relevant to this e-invoicing case. By expanding the "Validation-Document" all used API fields become visible. For further details, see our Document API here.
-
JSONata mapping: Enter the transformation logic that maps Nitrobox invoice data to the required e-invoicing schema. This field must contain valid JSON structure and JSONata expressions.
JSONata mapping:
The JSONata mapping defines how Nitrobox data is transformed into the required e-invoicing format (e.g., UBL, FatturaPA) expected by Avalara.
This mapping translates internal Nitrobox fields into the target format structure using JSONata – a lightweight query and transformation language for JSON.
In the mapping, placeholders like ident, documentDate, items[].prices.total.net or customerDetail.invoiceAddress.vatId refer to fields in the Nitrobox data model. Conditional logic (e.g., $boolean(...), $mapQuantityType(...)) allows for dynamic generation depending on invoice contents.
Once the mandate mapping is created, define the Document Provision Settings to determine under which conditions e-invoicing will be generated:
-
Navigate to Configuration -> Billing -> Document Provisioning
-
Create or edit a provisiong rule
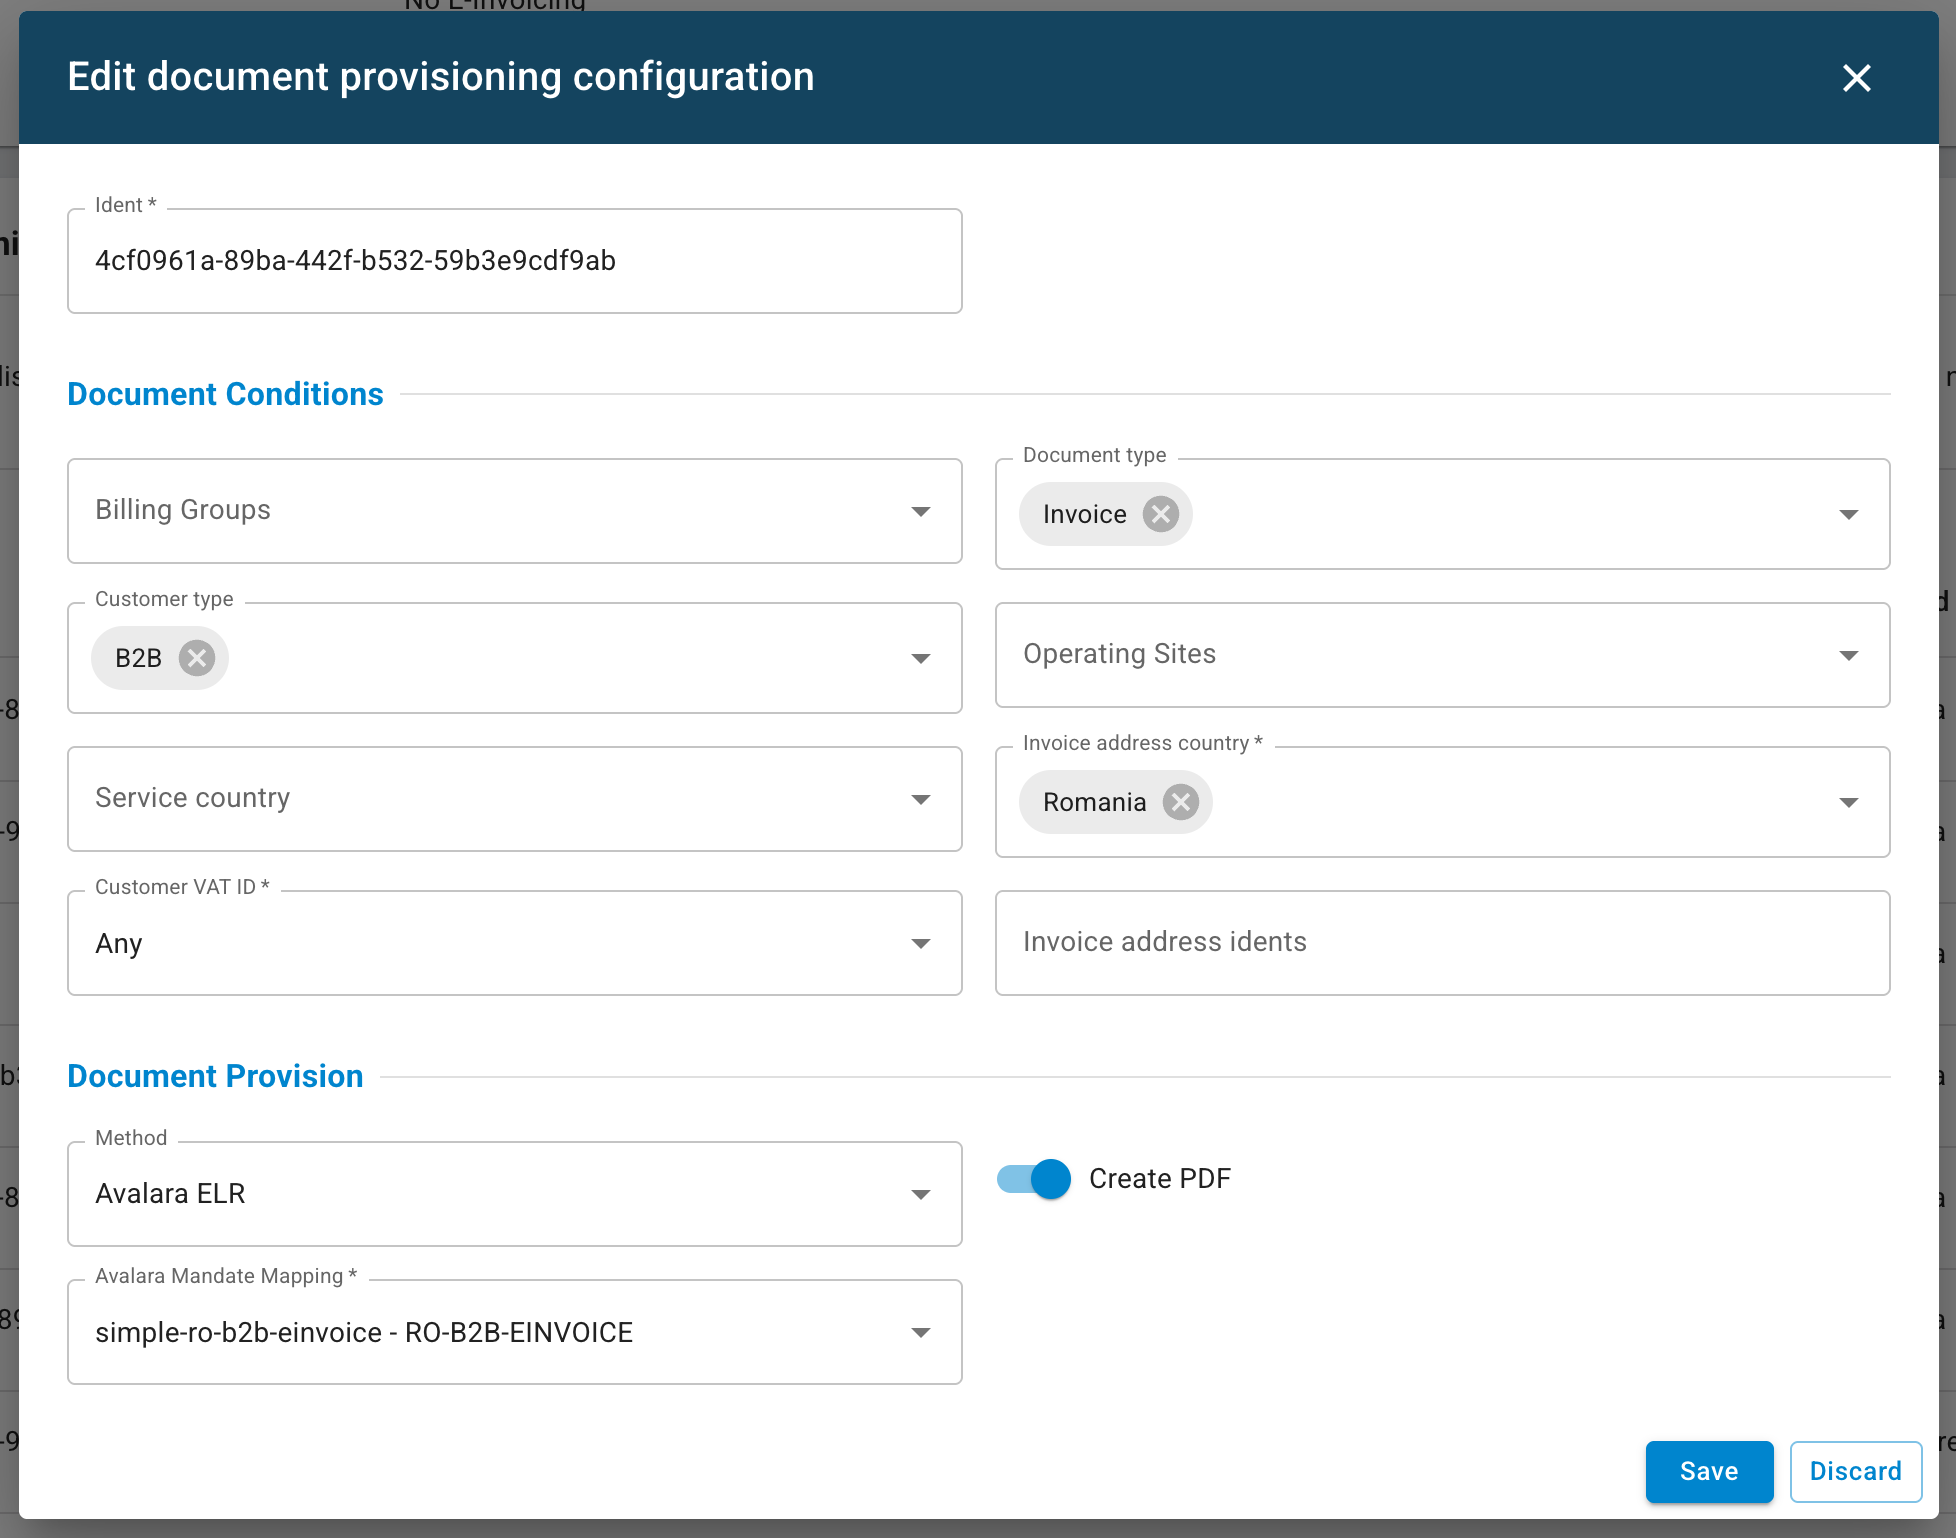
- Define document conditions (e.g. Billing Group, Document Type, Customer Type, etc.)
- Set the Document Provision Method to Avalara ELR
- Assign the corresponding Avalara Mandate Mapping
Expert Mode allows you to define advanced conditional logic that controls when an invoice is submitted to Avalara ELR.)
When Expert Mode is enabled, you can enter a JSONata expression that is evaluated for each document during provisioning. Only if the expression returns true, the document will be processed as an e-invoice.
This enables you to apply fine-grained logic beyond the standard configuration options (such as Document Type or Billing Group) and use any field from the Nitrobox Document API as a condition.
Example: Generate e-invoices only if the invoice total exceeds 100 EUR:
documentTotals.totalGrossSum > 100All available fields from the Nitrobox Document API can be used inside the JSONata expression. You can find the full schema here: [Nitrobox Document API Reference]
Rule Order & Priority
Document Provisioning rules are evaluated from top to bottom. The first matching rule is applied. If no rule matches, the default document provisioning configuration is used.
The order of the rules is critical: rules with more specific conditions or a later “valid from” date must be placed above more general rules. For example, a rule valid from December 1st must be placed above a rule valid from October 1st, otherwise the earlier rule will always match first.
You can change rule priority using the arrow buttons in the Actions column (⬆ / ⬇). Changes take effect immediately after saving.
Updated 2 days ago