Manage Plans
This page has been archived. Please look to the other pages about how Plans work in Nitrobox.
Add a plan
Step 1: Add a new plan
To create a new plan, navigate to: Configuration > Business Model > Plans > Plan Overview
Click the „+ Add“ button in the top left corner of the plan overview and an overlay opens.
Step 2: Define the parameters
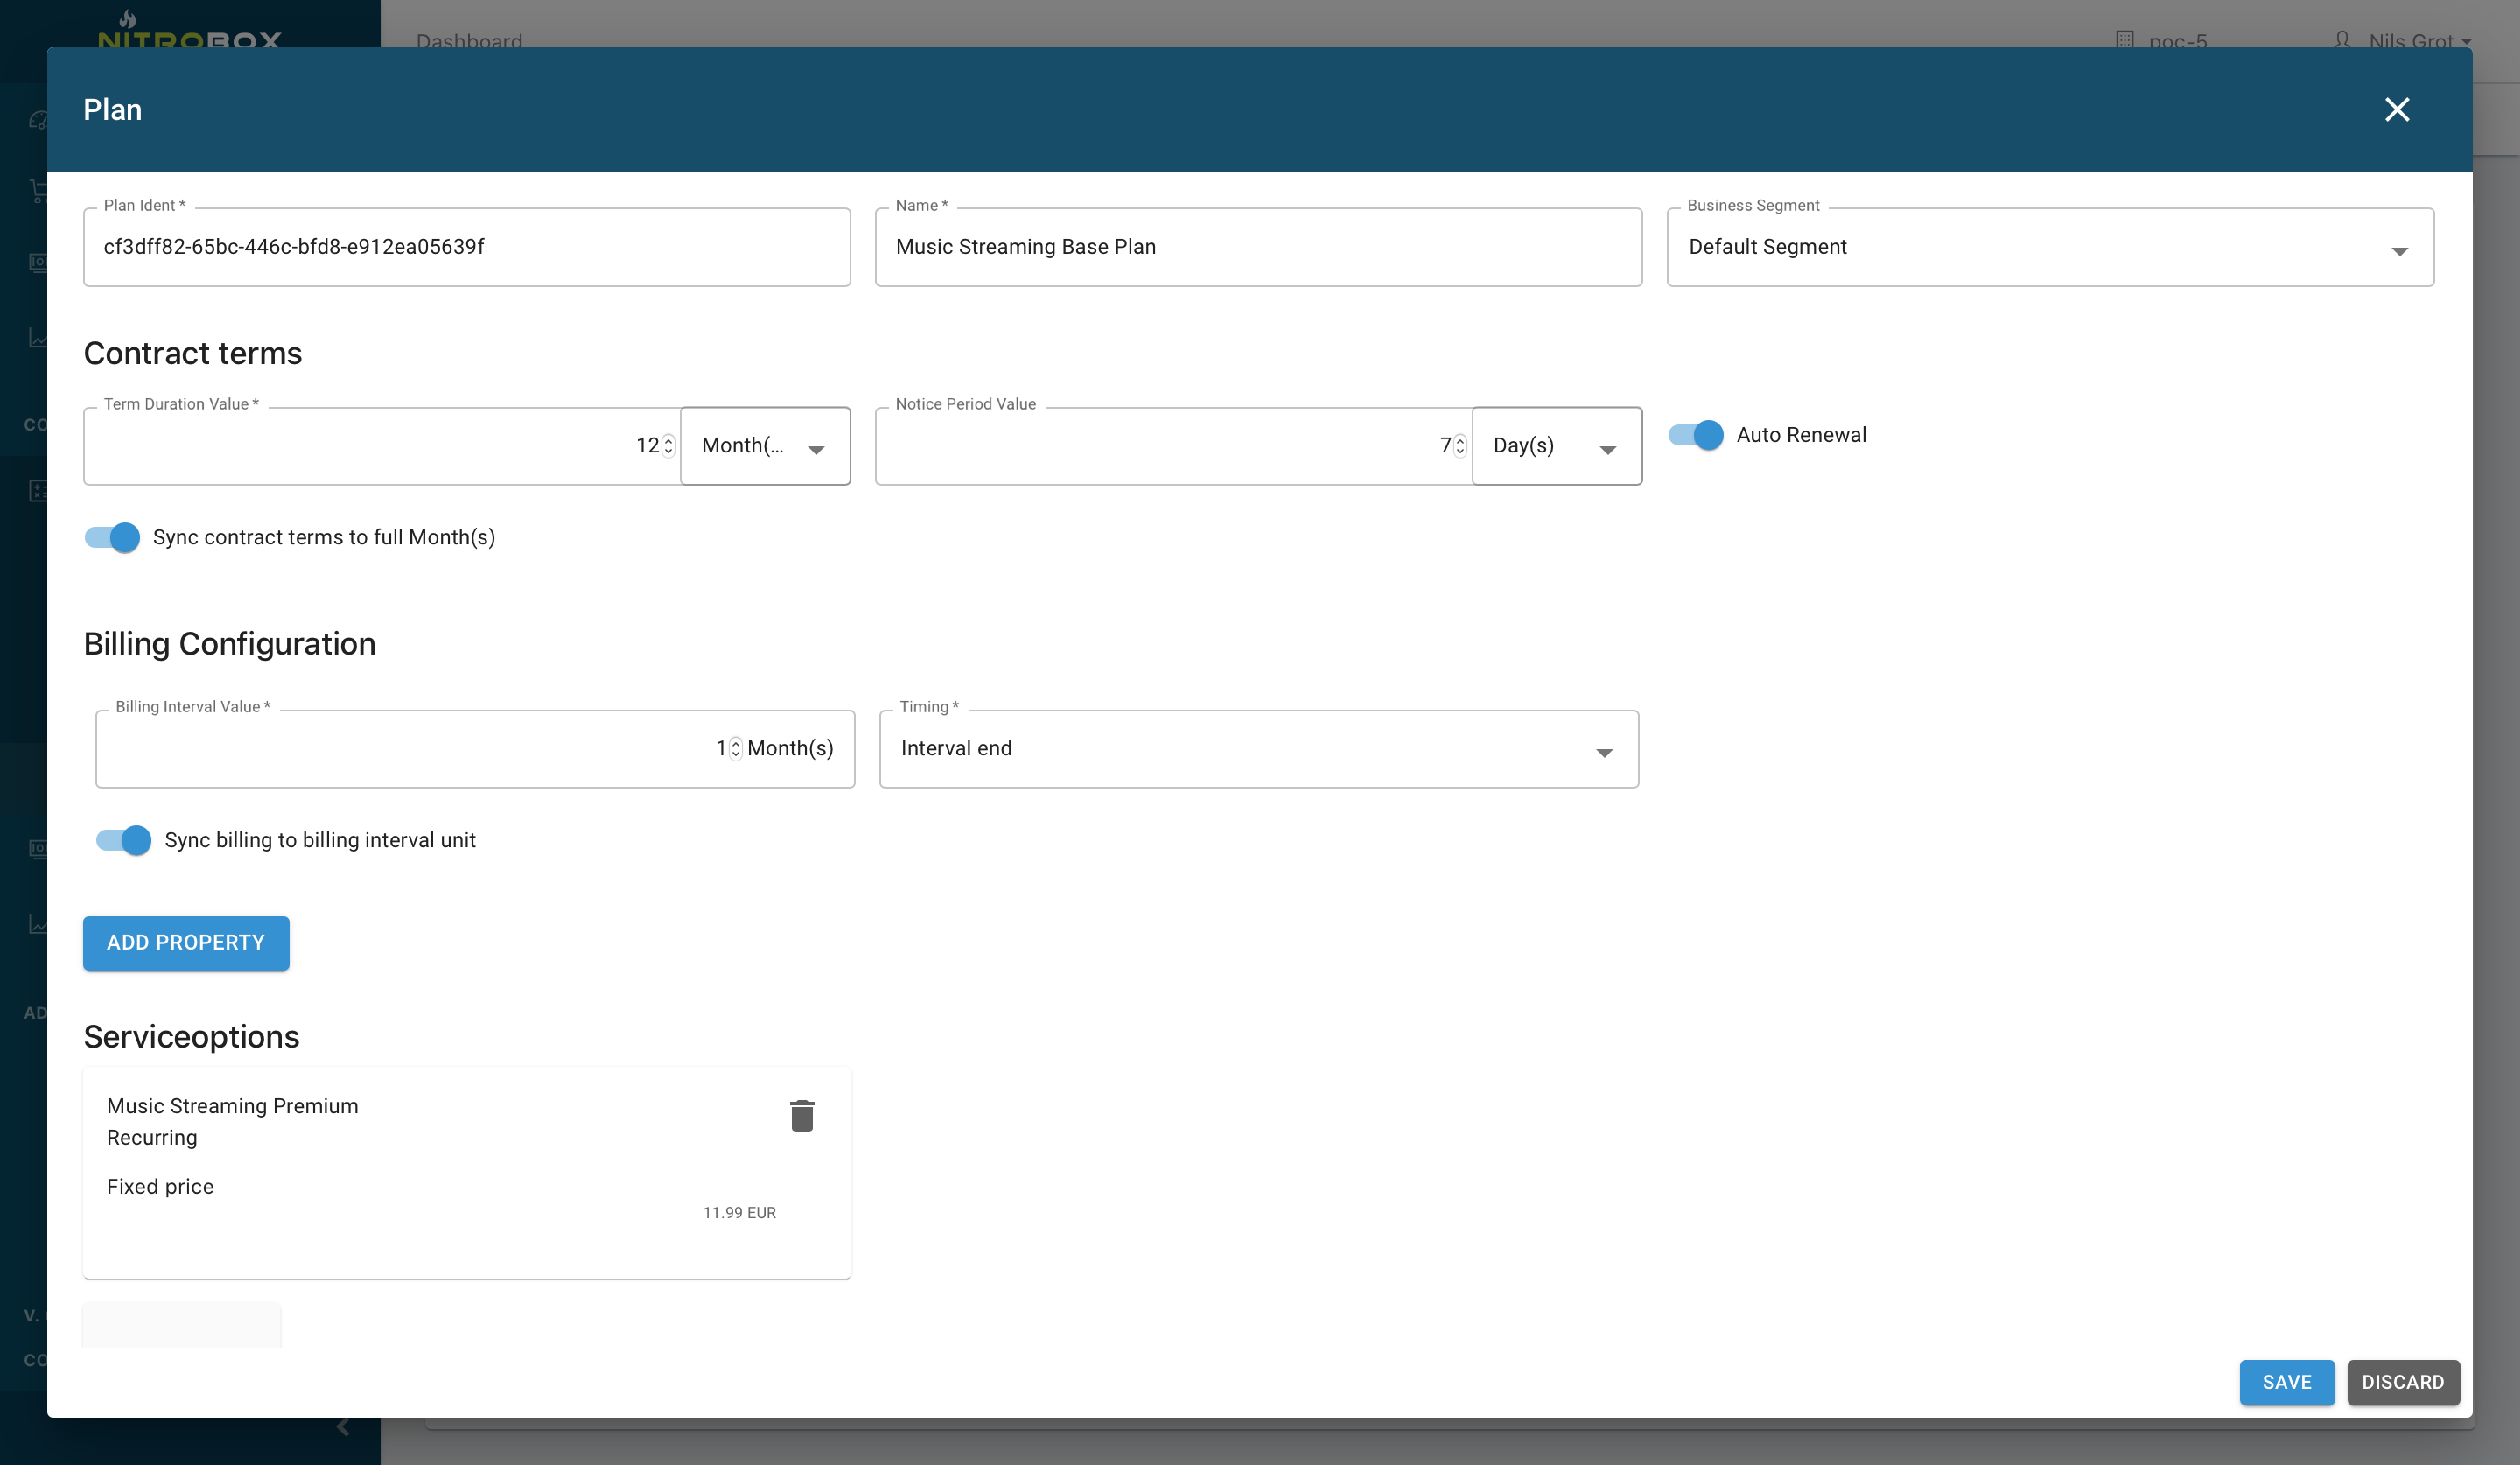
Fill out the following data fields listed in the overlay. All fields marked with an *asterisk are mandatory.
1. Plan ident and Phase ident
These idents are unique identifier for the plan. It is pre-filled by the Nitrobox system as a UUID, but can be modified according to your specifications.
2. Name
The name of the plan
3. Business segment
The business segment the new plan will be assigned to. Business segments are used to divide a tenant into various units that have different requirements, e.g. different document templates. The field offers a drop-down menu function. The "Default segment" is pre-selected. You can create own segments to choose from. Learn more about creating business segments.
4. Add property
If you want to add additional data fields to the plan entry, you can do that with the “Add property” button. Click the button and two new data fields named “Property ident” and “Property value” will appear. The properties refer exclusively to the selected plan and do not appear as data fields in other plans.
Property example for plans:You'd like to add the data field "Data volume" to the plan "Mobile phone plan 25" that includes a data volume of 25 GB. You can do that with a property data field.
Property ident: Data volume
Property value: 25 GB
You can repeat the process as many times as you like to add further properties. According to your requirements properties can then be listed on customer documents such as contracts or invoices.
Step 3: Create a first phase
Now it's time to create the first phase for your plan. The Nitrobox multi-phase plan feature enables you to map exactly the plan and contract lifecycle you need.
Fill in the "Phase ident" (data field is pre-filled) and "Name" the first phase. Then continue with the following data fields.
1. Term duration value
The term duration value defines the duration of the contract. The duration unit can be either day, month, or year.
2. Notice period value
- The notice period for normal termination of the contract. If the "Auto renewal" feature is activated, the contract will renew automatically.
3. Sync contract terms to full month(s)
Use this switch to sync a contract term to a full billing interval unit (day, month, year), if a contract started over the course of the respective unit.
Contract sync example:A 12-month contract starts on May, 15th and the billing interval value is one month.
- When you activate the “Contract term sync switch”, the document creation will be set to June, 1st instead of May 15th.
- The invoice amount will be prorated and billed on June, 1st for the past two weeks of May. For the following months, the billing will take place on the first of a month for the entire previous month, e.g. on July, 1st the service period June, 1st-30th will be invoiced.
- The final invoice will be created May, 14th, for the final period May, 1st-14th.
If the sync switch is not activated, the billing will take place according to the respective start date of the contract and the chosen billing interval unit.
4. Billing interval value
The billing interval value defines the billing period of a plan.
Example: Your plan has a service period of 12 months, and you would like to bill the customer quarterly. Set the term duration value to 12 months and the billing interval value to 3 months.
5. Billing timing
The field “Timing” defines if a plan will be billed at the start or the end of the billing period. Let's apply this to the above example.
Billing timing examplesPeriod May 15th – 31st:
If you select "Interval start", the billing will be on May, 15th (pre). Select “Interval end” the billing will be on May 31st (post).
Period June 1st - 30th:
If you select "Interval start", the billing will be on June, 1st (pre). Select “Interval end” the billing will be on June, 30th (post).
6. Sync billing to billing interval unit
Use this switch to synchronize the plan's billing process with the billing interval.
7. Options
Now it's time for the options (what products will be billed in the plan). They represent different pricing models which can be one-time, recurring or usage-based. Add the options directly or at any time after the plan is created. To see how to add or create options proceed to Step 4.

Step 4: Add an option
After you have entered the plan data, you can add the options. They determine how products or services will be billed. Options can be one-time, recurring or usage-based. Each option type has its own characteristics that define the billing process.
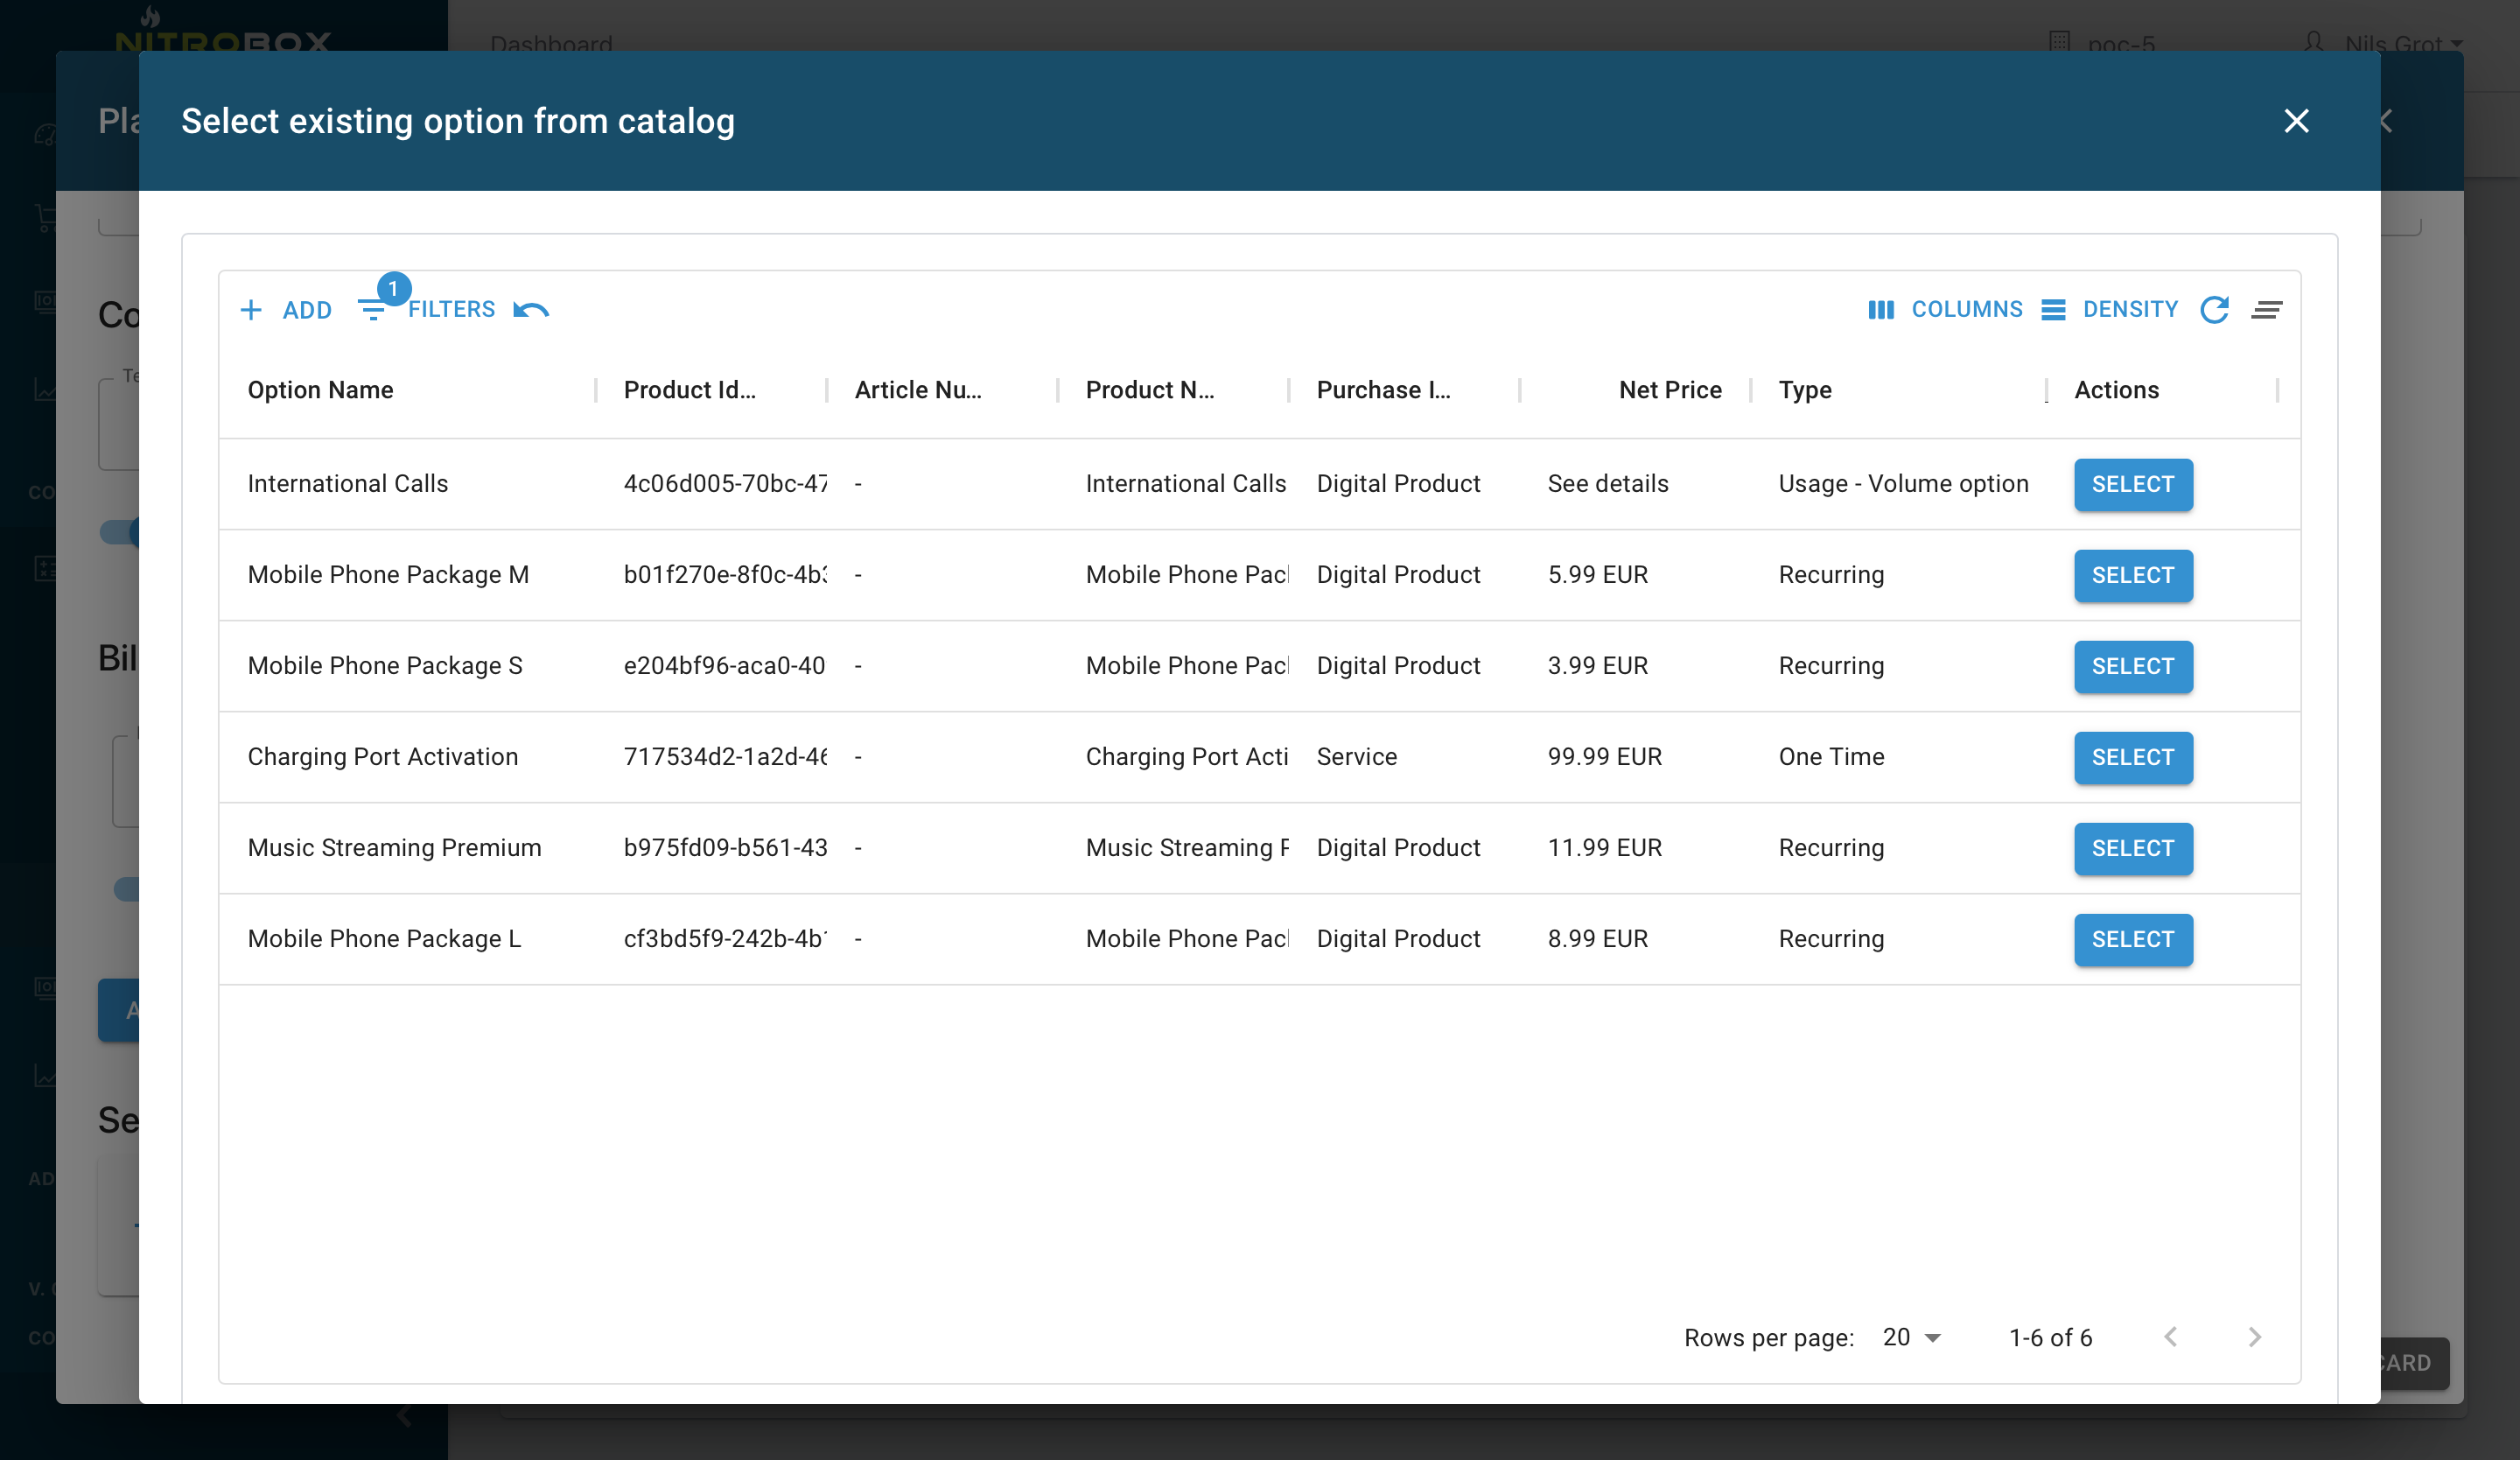
Click the „Add option“ button and select an option from the options catalog or create a new one. Get familiar with creating options. After selecting the option you'd like to add, you will get back to the plan creation form automatically. If you would like to add more options to the plan, repeat the steps.

Step 5: Create multiple phases
If you need more than one phase, continue creating more phases. Nitrobox allows you to create an unlimited number of phases for your plan to map exactly the contract lifecycle you need. Specify your phases and transitions from none, to auto renewal, next phase and interation + transition. Learn how to proceed to manage phases and transitions for your plan.
Step 6: Confirm and save
After adding all options, phases and transitions, click the “Save” button in the bottom right corner to add the new plan. A confirmation note will pop up at the top right corner. The new plan will be listed in the plan overview and can be assigned to any contract now. If you want to cancel instead of save the new plan, click “Discard” and the pop-up window will close.
Duplicate a plan
This feature allows you to create new plans without having to start from scratch and saves valuable time. Let's see how you can duplicate an existing plan and make the required adjustments with just a few clicks.
Step 1: Duplicate the plan
To copy a plan, navigate to: Configuration > Business Model > Plans > Plan Overview
Select the plan you want to duplicate from the plan overview. Go to the end of the entry line and click the „Actions" button and select "Copy plan".
Step 2: Edit the data sections
The plan pages opens, prefilled with the duplicated plan conditions. Now you can edit the data fields according the requirements of your new plan.
Enter the contract terms and billing configuration and retain or delete the option included, if any, to add a new option. To get more info how to fill the plan data sections, continue with "Step 2" of adding a plan.
Delete a plan
You can delete plans only if there are no contracts assigned to it. If that's the case, go to the plan overview page and click the "Actions menu" at the end of the respective entry. Click "Delete plan" and an overlay opens where you can confirm by clicking "Delete" or cancel the operation by clicking "Discard".
It is also possible to cancel a plan via the plan details page. Click the "Delete plan" button and continue as described above.
Updated 2 months ago
